|
GEOFENCING GENERAL OVERVIEW |
GeoFencing basically means that the Transics system alerts you when a certain vehicle enters / leaves a certain area around a geographical position, for instance a POI, a customer's or a supplier's site. You can create this GeoFencing object yourself in the module Settings > Management> GeoFencing or starting from the map.
There are 3 types of GeoFencing:
Standard GeoFencing: The driver and / or the home base get a warning when the vehicle enters / leaves an area.
Scheduled Time of arrival (STA): The driver and / or the home base get a warning when the vehicle has not arrived in this area by a certain time.
Restrictive GeoFencing: The driver and / or the home base get a warning when a specific activity in a certain area takes too long.
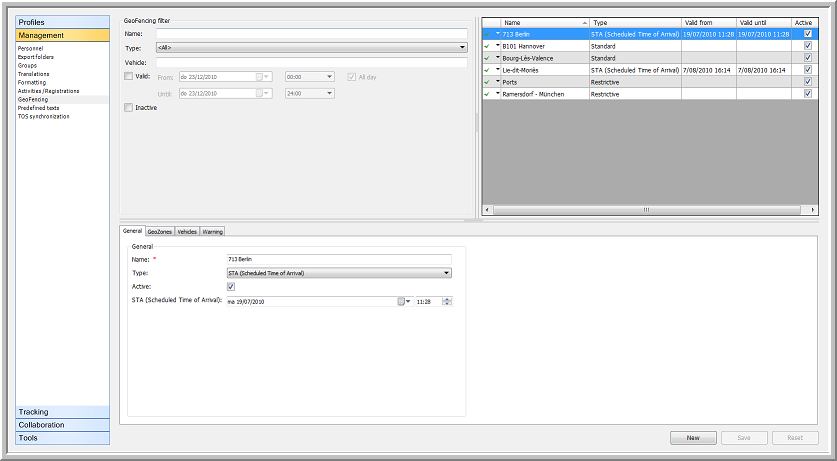
The GeoFencing settings screen is divided into 3 zones:
The upper left zone contains the "GeoFencing filter".
The upper right zone contains the "GeoFencing object" table.
The zone below contains the details of the selected GeoFencing object.
With a Standard or a STA GeoFencing object, the bottom zone contains the four details tab pages: "General", "GeoZones", "Vehicles", "Warning".
When choosing a Restrictive GeoFencing object, a fifth tab page "Activities" will appear.
At the bottom of the page you will find the buttons New, Save, Reset.
|
FOLLOW-UP |
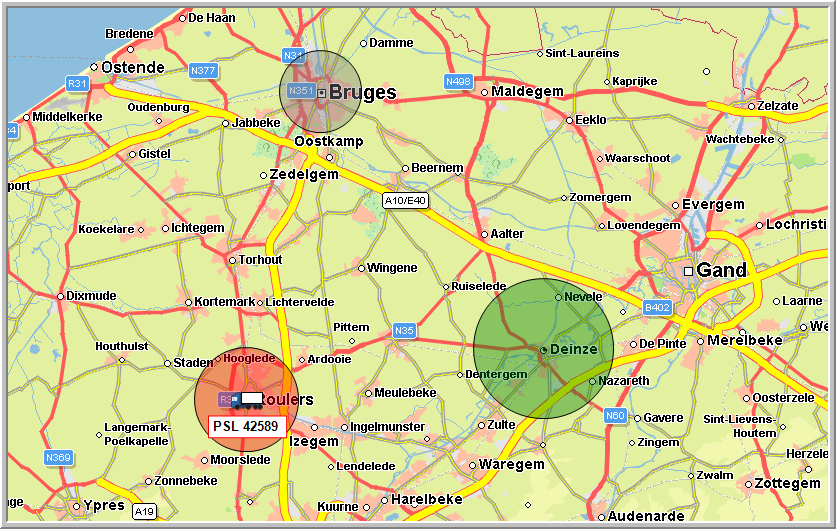
On the map, a GeoFencing object is visualised as a circle around a company POI or an address, i.e. a GeoZone. Initially the circle is coloured grey. Depending on the settings in the "Warning" tab page, the colour of the GeoZone can be either green when an event labelled as positive takes place or red when an event labelled as negative takes place.
Note that when a GeoFencing alarm is answered, it will be set to treated. This also means that the status on the map will be updated (grey circle instead of red or green).