- Unsaved information
- Corrected information
- OBC: added by the driver on the OBC
- Manual: added by the user in TX-SOCIAL / TX-CONNECT
|
Allowances |
(only TX-SKY only and Mixed fleet environment)
The allowances table contains a detailed overview of all allowances of the selection you made in the search area.
|
Status:
|
| Driver | |
| Date: created date | |
| Name: type of allowance | |
| Code: allowance code | |
Source:
|
|
VISUALISATION |
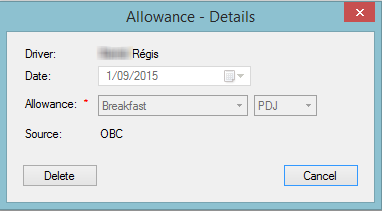
Double-click a line to display the detailed information of the allowance:
|
Edit / delete / insert allowance |
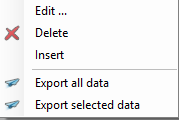
If you right-click on one of the rows, you see the following options:
|
|
Edit an allowance. |
|
Delete an allowance. |
|
|
Insert a new allowance. |
|
|
Create an Excel report of all data. |
|
|
It is possible to select multiple rows at once by holding the Ctrl button. Click here for a general example of a data export. |
Delete an allowance
 |
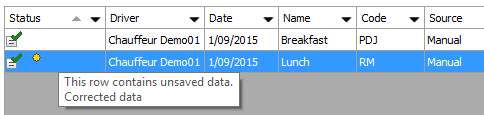
Right-click an allowance and press Delete to remove an allowance. The deleted allowance will first be crossed out as shown in the screenshot. Click on the Save button to save the changes you made and remove the allowance from the overview. |
|
|
Allowances can also be deleted from the allowance detail screen. |
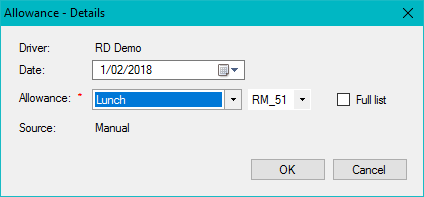
Insert / Edit an allowance
|
|
Select the correct date. |
|
Select the type of allowance / allowance code. Note: As from TX-CONNECT version 11.43, when you add or edit an allowance, only the allowances relevant for the selected user are displayed in the list of allowances. The relevant allowances are the allowances with the same regulation set as the active regulation configured for the company (in TX-SERVICE) and the allowances available in the assigned instruction set. Select the checkbox "Full list" to display the entire list of allowances (the selection is saved). |
|
|
Press OK to confirm. The "Source" will be automatically set to Manual. Click on the Save button to save the changes you made. |
The first column of the table (the Status column) contains status indicators which convey a certain message for the information line. These are the possible indicators:
 |
|
Unsaved information |
|
|
Corrected information |
Click on the Save button to save the changes you made to the information. Your user name will automatically appear in the Modified by column.