|
NEW TRIP |
Depending on the on-board computer and its instruction set, you can create planning items with a trip or a place as the top level.
A new trip can be created, starting from the vertical Toolbar, the Modules drop-down list in the top left corner, the Planning overview or the Vehicle Follow-up module.
|
CREATING A NEW TRIP |
|
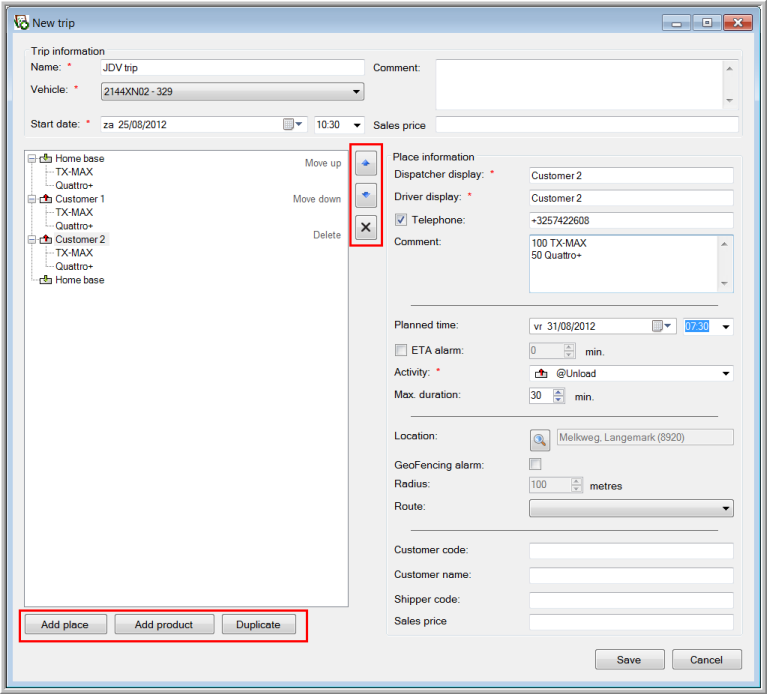
Trip information |
|
|
Name |
The trip name is a mandatory field, even if your planning does not contain a trip level. |
|
Vehicle |
Select the vehicle to which you want to send the planning. This is also a mandatory field. |
|
Trip start date |
Start date and hour of the trip. |
|
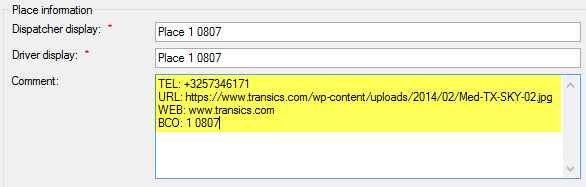
Comment |
Free comment field. |
|
Sales price |
The sales price for the entire trip. |
Once you have completed these fields you can start completing the place information.
|
Place information |
|
|
Dispatcher display |
The place name that will be shown in the home base software. |
|
Driver display |
The place name that will be shown on the driver's on-board computer. |
|
Telephone |
This field is only available if the vehicle is equipped with a voice kit. Make sure the number starts with "+", preferably followed by the country code. |
|
Comment |
Free comment field. |
|
|
|
|
The planned time of arrival at the selected place. |
|
|
Tick this checkbox and define after which delay you want to receive an alarm. When this option is selected, the planned time of arrival is compulsory. |
|
|
Activity |
Select the activity to be performed at this place. The activity icons can be modified under Settings > Management > Activities / Registrations. |
|
Define the maximum duration of the selected activity. If the duration is exceeded, you will get an alarm. This value must be a multiple of 5. |
|
|
|
|
|
Assign a precise position to the selected place. This can be an address or a company POI. Note: As from TX-CONNECT v11, GPS coordinates can also be sent to TX-SMART devices. |
|
|
GeoFencing alarm* |
Tick this checkbox if you want to assign a GeoFencing alarm to the location. This is a standard GeoFencing alarm when entering the GeoZone. |
|
Radius* |
Define the radius of the GeoZone in meters. |
|
Route* |
Assign a new or an existing route to get to the selected place. Click here for more info. |
|
* When selecting a TX-SMART vehicle, these fields are not available. |
|
|
Customer code |
If necessary, you can add the customer code. |
|
Customer name |
If necessary, you can add the customer name. |
|
Shipper code |
The shipper code is the code of the delivery company your vehicle is driving for. |
|
Sales price |
The sales price for the selected place. |
Add places and products to your planning with the buttons in the lower left corner of the window: Add place / Add product / Duplicate the selected item.
When adding a product, the Product information fields are made available:
|
Product information |
|
|
Name |
The product name is a mandatory field. |
|
Comment |
A free comment field. |
When duplicating an item, the selected place or product in the trip overview will be copied.
Planning can be sent to TX-SMART vehicles in the same manner as to a normal OBC. Enter all required trip information as you would for any planning trip.
For TX-SMART, some additional options are available: cf. Additional TX-SMART features below.
|
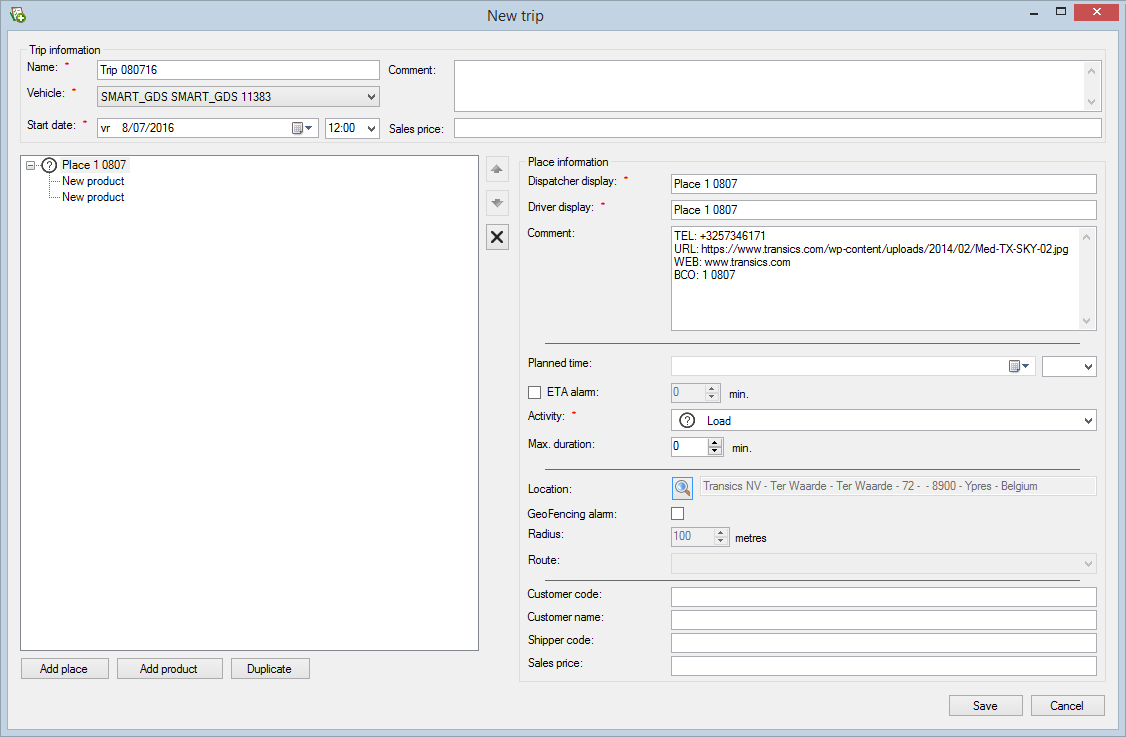
Additional place options can be activated in TX-SMART by inserting specific "tags" in the Place comment lines in TX-CONNECT: |
|||
|
Tags in comment of place information (TX-CONNECT)
|
Place option list (TX-SMART)
|
||
|
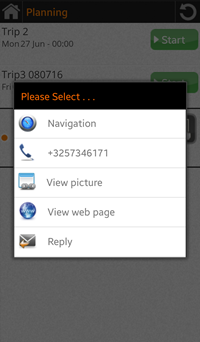
In case a phone number was added to the planning item (“TEL:” in the comment line), the number is added to the TX-SMART place options. Tap the number to start a voice call.
Example: TX-CONNECT:
TX-SMART:
|
|
A link to a picture (supported file types: .jpg / .png) can also be added to the comment lines of a place (“URL:xxx” in the comment line). As a result, the View picture option appears in the action list of the place in TX-SMART.
Example: TX-CONNECT:
TX-SMART:
|
|
|
A link to a web page can also be added to the comment lines of a place (“WEB:xxx” in the comment line). As a result, the option View web page appears in the action list of the place in TX-SMART. TX-SMART uses the device browser to navigate to the specified location.
Example: TX-CONNECT:
TX-SMART:
|
|
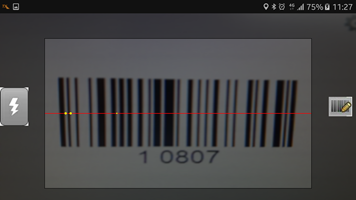
A barcode can also be added to the comment lines of the place (“BCO:” in the comment line). When a barcode is included, the barcode scanner is automatically opened when starting the place in TX-SMART. In this way, you can only start the specific place by scanning the barcode that is included in the planning item. |
|
|
More info on TX-SMART can be found in: TX-SMART Quick Guide |
|||