The top zone contains a grid where you can select an employee who has already been entered in the system.
|
USER MANAGEMENT |
In the "Users" module, you can consult the user information. As an administrator, you can add users, remove them or modify their data.
General overview
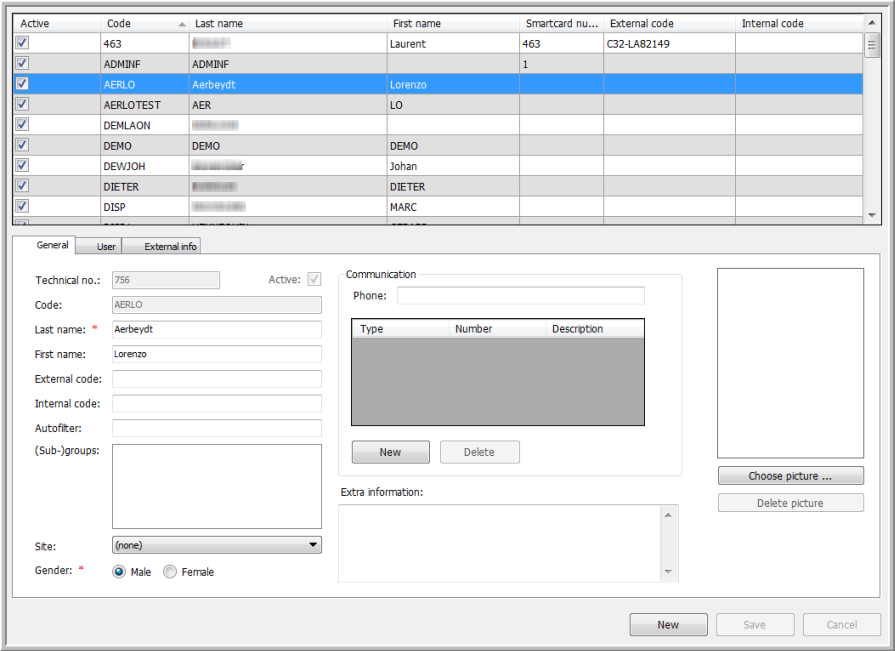
The users window is divided into 2 zones:
The top zone contains a grid where you can select an employee who has already been entered in the system.
 The bottom zone consists of three tab pages: a General tab page, a User tab page and an External info tab page .
The General tab page is selected by default.
If you select a user in the grid (upper part), you will see the following information in the General tab page:
|
Technical no. |
The technical number is a code that is automatically generated by the software. It is used for assigning data to the correct employee. |
|
Code |
This code serves as the identification of the employee, and can only be chosen during the creation of the employee by the user. This code can contain any character, except for a space. |
|
Last name |
The employee’s last name. |
|
First name |
The employee’s first name. |
|
External code |
Code to identify the personnel member in an external software application (transport software for planning, administration, logistics...). |
|
Internal code |
Identification method that can be used in TOS (Transics Office Suite) reports. (By means of parameters in TFM / TMS (Transics Fleet Monitor / Transics Management System), this field can be printed in reports, next to the driver’s name.) |
|
Autofilter |
Free text field that is used for internal grouping of personnel members. |
|
(Sub)groups |
The groups or subgroups to which the driver / dispatcher belongs to. |
|
Site |
The main site for the driver / dispatcher (in case a company has different sites). |
|
Gender |
Indicate the gender of the employee in the corresponding checkbox. |
|
Communication |
Phone or fax number of the employee. |
|
Extra information |
Free editable field to add extra information on the employee. |
|
MODIFYING THE USER DATA |
To modify the user data (only for administrators), select the user of whom you want to change data in the grid.
In the General tab page, you can modify all the data in the different fields. The fields, marked with a red asterisk * are mandatory and must be filled in correctly.
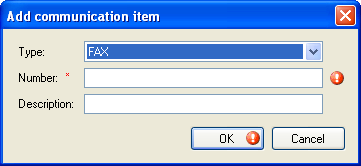
In the Communication field, you can add the following communication items as there are: FAX, GSM, TEL., ...(depending on the communication items that are installed on your database).
Click on New. The "Add communication item" window will appear.
|
|
Choose the type of communication item that you want to add:
|
Fill in the number and click OK.
|
ADDING PICTURES OF STAFF MEMBERS |
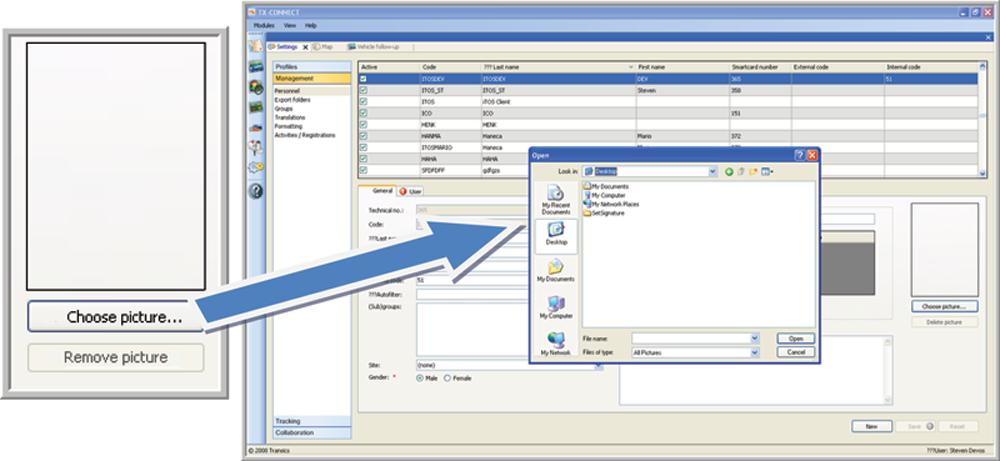
Click Choose picture.
Windows Explorer will open.
 Now you will be able to select a picture on your computer.
 Important remark
All pictures that have been saved in TFM (Transics Fleet Monitor), e.g. from staff members, will no longer be available in TX-CONNECT. This is due to the use of different databases (TFM gets the information from the fleet database, whereas TX-CONNECT gets all the information from the central database). Consequently, you will have to import all pictures in TX-CONNECT again.
 Save your changes by clicking on Save, this will only be possible when the fields that are mandatory are correctly filled in.
 Click on Reset if you want to undo the changes you have just made.
|
ADDING A NEW USER |
In the General tab page, click on New.
You will get an empty general tab page to fill in the data of the new user. All the fields, marked with an error provider  are mandatory. As long as these fields are not correctly filled in, you will get the following message:
If the mandatory fields are filled in, the error provider will automatically disappear.

Fill in the form and click Add.
In the User tab page, you can define the language of the dispatcher, fill in his e-mail address and select his profile (rights).
|
User ID = the field to log-in on the webpage |
|
Choose the language in the list. |
Remark:
If you create a new user, the default password will automatically be used for the first log-in. It will have to be changed during this first log-in.
|
CHANGING THE PASSWORD |
The logged-in user can change his own password (this is only possible if the logged-in user = the selected user).
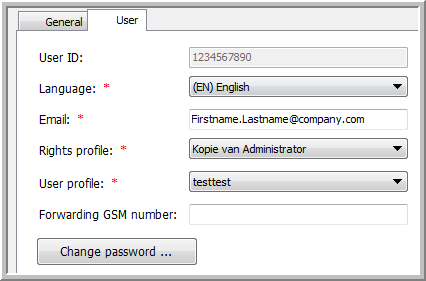
In the User tab page, click on Change password.
A window to fill in the new password will appear.
Fill in your new password, repeat it to confirm the password and click Save.
The password will immediately be saved in the database.
Remark: to compose your password you can use any type of character, except for a 'space'. The password must contain a minimum of 6 characters and a maximum of 35 characters.
|
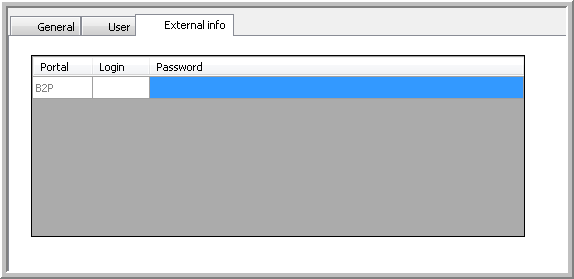
ADD EXTERNAL INFO |
In the External info tab page, you can add credentials for external applications.
For instance, you can fill in your B2P login and password. This allows you to see the freight details for this provider in TX-CONNECT.